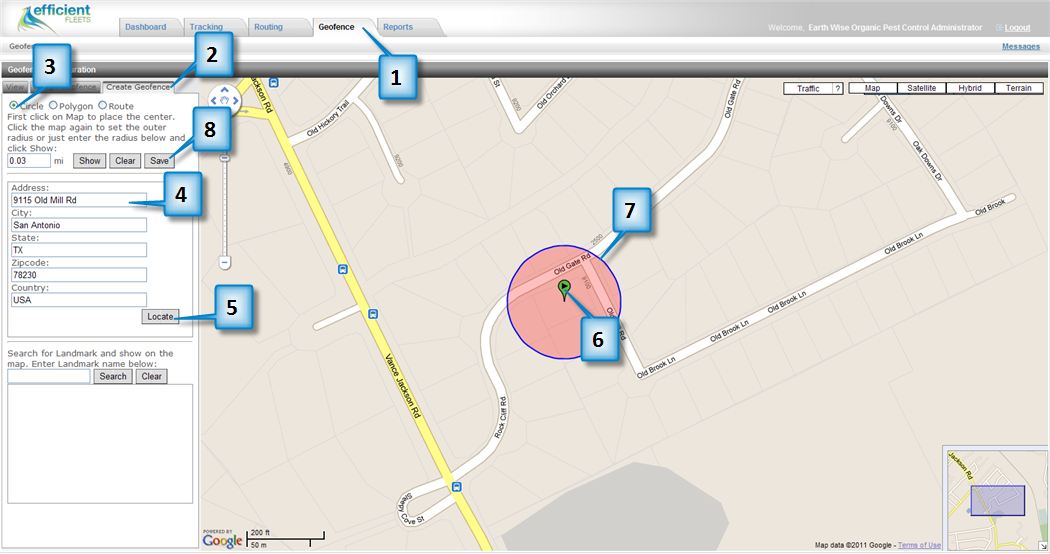
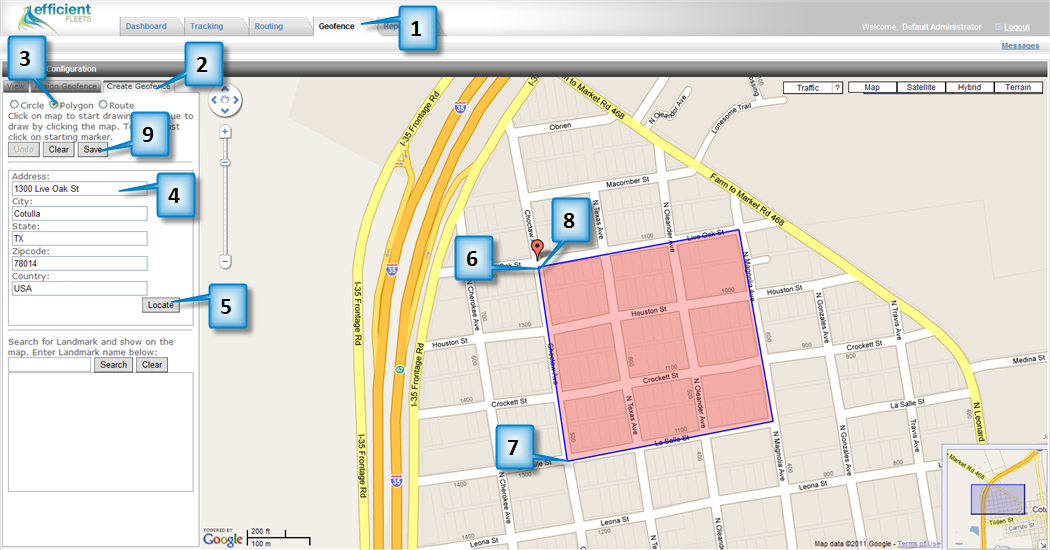
1. Click on the Geofence tab.
2. Click on Create Geofence.
3. Click on Polygon.
4. Enter an address including city, state, and zip. This location should be where you want to draw the geofence.
5. Click Locate. You should now see an icon on the map indicating where the address is located.
6. Click on the map to start drawing.
7. Continue to draw by clicking the map.
8. Click the starting icon to finish the geofence.
9. Click on the Save button.
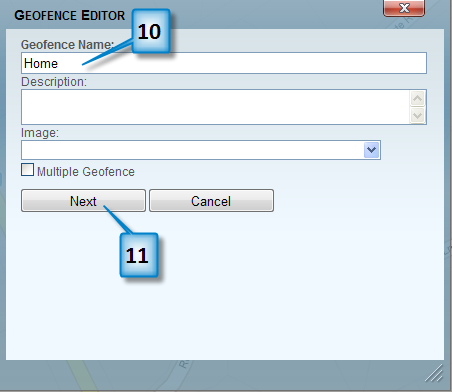
10. Enter a geofence name.
11. Click on the Next button.
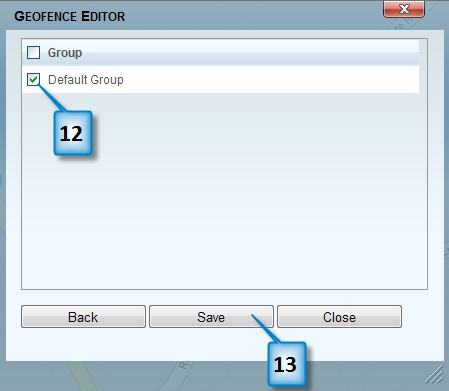
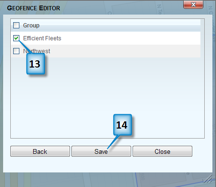
12. Click on the checkbox next to the Group(s) that you want to assign this geofence to.
13. Click on the Save button.