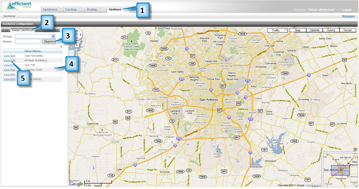
Author Archives: Jeannette Kremer

Configure Tracking

Configure Tracking

To configure a GPS device for tracking you need to have the IMEI/Serial number of the GPS unit. The number is on the sticker located on side of the unit. For CalAmp devices use the ESN number.

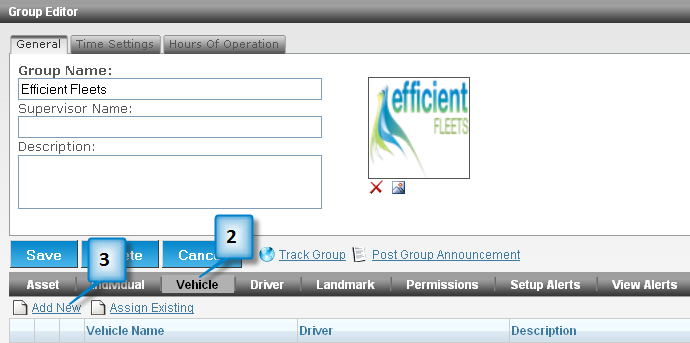
1. Click on Configure Tracking.
2. Optional: Choose Image.
The Image is the icon that will represent the vehicle on the map.
3. Select Hardware Profile.Choose CalAmp or Enfora.If you do not know your hardware profile consult your account executive.
The Hardware Profile has to match the type of device you have purchased.
4. Enter IMEI/Serial.
The IMEI is the unique ID for the GPS device. This must be entered correctly to properly track the item. For CalAmp units enter the ESN number.
5. Optional: enter the Phone Number for the SIM card in the GPS device.
6. Optional: enter 120 into the Reporting Frequency (Seconds) textbox.
7. Make sure Status is enabled.
8. Optional: select a trace color.
The trace color is the color of the line that shows the path an item travelled.
9. Click on the Save button.

Group Editor 3

Add New Vehicle

Add New Vehicle

1. From the Dashboard, click on the Group name you created in the previous lesson.
2. Click on Vehicle.
3. Click Add New.

Group Editor 1

4. Enter Vehicle Name.
5. Optional: enter Description.
6. Optional: enter VIN.
7. Optional: enter Make.
8. Optional: enter Year.
9. Optional: enter Model.
10. Optional: enter Color.
11. Optional: choose a photo.
12. Click on the Save button.

Group Editor 2

Group Editor

Group Editor

The Group Editor is where you can add, delete, or modify a vehicle, individual, or asset. You can also manage landmarks, alerts, and permissions.

In the Group Editor you can:

• Add a new vehicle
• Configure tracking
• Add a new driver
• Assign a driver to a vehicle

Client Tools

Client Tools
This section gives you access to general administrative functions.

Manage General Settings
The General Settings allows you to control items such as Preferences, Captions, Map Images, Map Options, and Display Format. The Preferences tab controls general settings for the website. For example, the default entry page can be changed from Dashboard to Tracking page.

Preferences
Client Tools 1

1. Default Entry Page: the page the user first sees when they login. You have two choices: dashboard and map tracking.
2. Session Display Mode: a session is 1 day. There are three ways that sessions are displayed on the Tracking page, last 24 hours (default), last active session (last time vehicle reported in), and show all items.
3. Support Email Address: email address for support.
4. Help Link URL: link to the online help system.
5. Allow Multiple Login: multiple users can login with the current account at the same time.
6. Messages Refresh Interval (Seconds): how often messages are refreshed. Messages can be sent from one user to another.
7. Inactivity Timeout (Minutes): if the user does not do anything for the prescribed time then the system will lockout the user. That user will have to login again to use the system. 0 means the system will not timeout.
8. Play MDT Sound: play a sound when an MDT message is received.
9. Auto Assign Geo-Fence: automatically assign a geo-fence to a Group when you save the geo-fence.
10. POI Buffer: the default buffer size for the landmark buffer.

Tools and Settings

The Tools and Settings section is where administrative tasks are completed, such as creating users, changing map options, creating landmark types, etc. The Tools and Settings section is accessed from the Dashboard screen. It is comprised of three sections, Client Tools, Landmark Tools, and Security Tools.

To access the Tools and Settings click on the Tools/Settings tab on the Dashboard.
Tools and Settings 1

Tools and Settings Overview
Tools and Settings 2

The Client Tools section is where you can manage the following items: general settings, post a system announcement, configure hardware messages, create and manage asset types, configure alert triggers, subscribe to reminders, manage reports, and create and manage maintenance items.

The Landmark Tools is where you can create landmark types and statuses, update a landmark status, import landmarks from KML, and create global landmarks.

The Security Tools is where you can manage the permissions for users that have access to the website. You can create new users, assign permissions, lockout a user, and manage group access.

Maintenance Reminder

To receive a maintenance reminder via email you have to setup a reminder subscription. A vehicle maintenance reminder requires that a maintenance schedule be setup.

Criteria for a Reminder
To receive a reminder the current vehicle odometer reading must be greater than the odometer reading of the last vehicle maintenance history record plus the maintenance schedule interval. For example, a reminder will be sent if the current odometer is 49,001 miles and the last maintenance record is 46,000 miles and the interval is 3,000.

1. Click on Tools and Settings.
2. Click on Subscribe To Reminder.
3. Click on Add Reminder Subscription.
4. Select Vehicle Maintenance Reminder from the Reminder Name dropdown menu.
5. Enter a Subject textbox, for example, “Oil Change Reminder.”
6. Enter an email address in the To textbox.
7. Click on the checkbox next to the Group you want to assign this reminder to.
8. Click on the Save button.
Vehicle Maintenance 4

Vehicle Maintenance 5

Vehicle Maintenance 6

How to Create a New Maintenance Record

You can create a maintenance record in the maintenance history section. You can enter new ones and update existing ones.

1. Click on the Maintenance History tab.
2. Click on Add New Maintenance Record.
3. Enter a description in the Description textbox.
4. Enter a date in the Completed textbox.
5. Enter the odometer at the time of service in the Odometer textbox.
6. Enter a name in the Service Provider Name textbox.
7. Click on the Save button.
Maintenance 2
Note: the Service Provider Contact and Service Provider Phone are optional.

Add New Service
The service is the actual work performed. You can add unlimited service records to a maintenance record.

1. Click on the Pencilnext to a maintenance record that you want to add service details too.
2. Click on Add New Service.
3. Select the service that was performed by clicking on the Operation dropdown menu.
4. Enter a description into the Description textbox.
5. Enter a cost in the Cost textbox.
6. Click on the Save button.
Vehicle Maintenance 3

How to Create a Maintenance Schedule

Vehicle Maintenance
You can schedule vehicle maintenance reminders and keep maintenance records for all the vehicles in your system. You can schedule maintenance based on odometer, engine hours, or date. You can track all types of maintenance tasks, such as oil changes, tire rotation, or brake inspections. All maintenance schedules and service records are maintained at the vehicle level.

There are two pieces to vehicle maintenance, maintenance schedule and maintenance history. The maintenance schedule section is where you add the type of maintenance you want to track. The maintenance history section is where you track maintenance that was performed on the vehicle. Each maintenance record can have detailed line items about the service(s) that were performed.

Create a Maintenance Schedule
To create a maintenance schedule you have to edit a vehicle first. Click on the pencil next to a vehicle name before you follow the steps below.

1. Click on Maintenance Schedule tab.
2. Click Add New Maintenance Schedule.
3. Click on the Operation dropdown menu to select the type of maintenance to schedule. If you want to add a new one click Add.
4. Click on the Interval Odometer (mile) to create a schedule based on odometer.
5. Enter a number into the Interval Odometer (mile) textbox. The number should be when you want to be reminded. For example, if you want to change oil every 3,000 miles enter 2,800 to be reminded 200 miles before the oil change is due.
6. Click on the Save button (located at the bottom of the Maintenance Schedule Editor).
Vehicle Maintenance 1

How to Assign a Geofence

A geofence has to be assigned to an item before it can be used.

1. Click on the Geofence tab.
2. Click on Assign Geofence.
3. Click on the Search button.
4. You should now see a list of vehicles.
5. Click View/Edit next to the vehicle that you want to assign a geofence to.
Geofence 4
6. You should now see the Assign and Schedule Geofence dialog box.
7. Click on the checkbox next to the geofence(s) that you want to assign to this vehicle.
8. Click on the Assign Schedules button.
Geofence 5
9. Select the Action. See below for a definition of the options.
10. Set the schedule for the geofence. By default a geofence is active Sunday through Saturday, 24 hours a day.
11. Click on the Save Assignments button.
Geofence 6
Action
• In = generate a violation if the vehicle enters the geofence. If a geofence alert is setup then an alert will be created when the item enters the geofence.
• Out = generate a violation when the vehicle exits the geofence. If a geofence alert is setup then an alert will be created when the item leaves the geofence.
• Both = generate an alert when an item enters or exits the geofence.

How to Create a Route Geofence

A route geofence is used to make sure that a vehicle stays on a fixed path. For example, you may have a delivery vehicle that you want to follow a designated route. A route geofence can verify that the vehicle stayed on course. All route geofences have a buffer that allows the vehicle to leave the path. This could be used for example to allow a vehicle to exit the highway to get gas. You define the buffer when you save the route.

1. Click on the Geofence tab.
2. Click on Create Geofence.
3. Click on Route.
4. Enter an address including city, state, and zip where you want to begin the route.
5. Click Locate. You should now see an icon on the map indicating where the address is located.
6. Click on the map to start drawing the route.
7. Continue clicking on the map to define the route.
8. Click on the Save button once you are done.
Geofence 1

9. Click on the Geofence tab.
10. Click on Create Geofence.
11. Click on Route.
12. Enter an address including city, state, and zip where you want to begin the route.
Geofence 2
13. Click Locate. You should now see an icon on the map indicating where the address is located.
14. Click on the map to start drawing the route.
Geofence 3
15. Continue clicking on the map to define the route.
16. Click on the Save button once you are done.