Category Archives: Support

How To Create A Polygon Geofence – Milo GPS

What Is A Polygon Geofence?

A polygon geofence is a virtual fence that you can draw in the Milo GPS tracking system to monitor when an item (vehicle, piece of equipment, or person) crosses the boundary. Geofences can be used in a variety of situations. For example, when you want to verify when when and for how long your vehicles are visiting a customer. Another good reason is to prevent your drivers from visiting places that are off limits during work hours, such as their home, girlfriend/boyfriend house, etc.

polygon geofence


Creating a geofence is very easy to do. Please follow the steps below to get started.

Create a Polygon Geofence

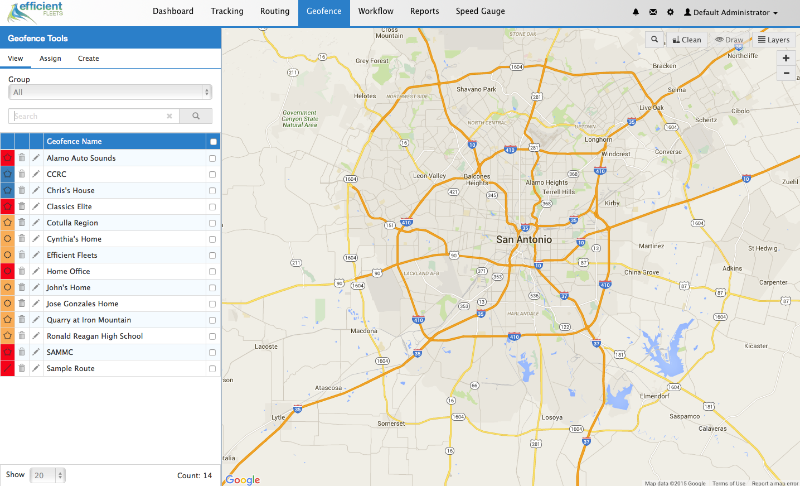
1. Click on the Geofence tab.

geofence
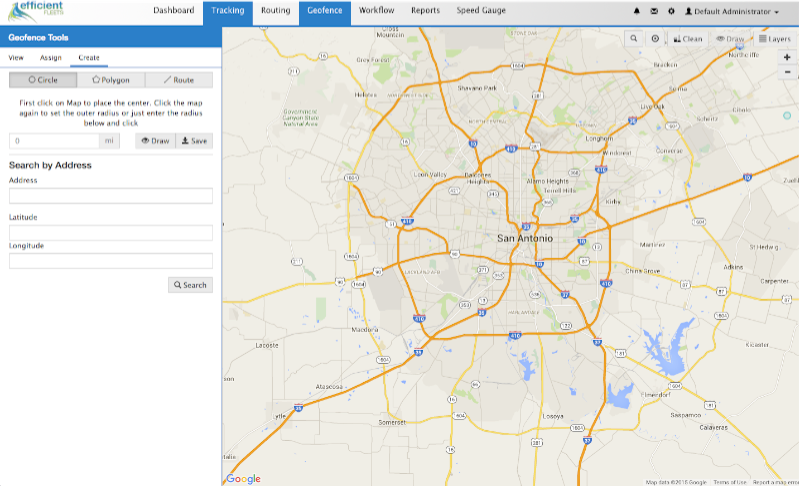
2. Click on Create.

create geofence


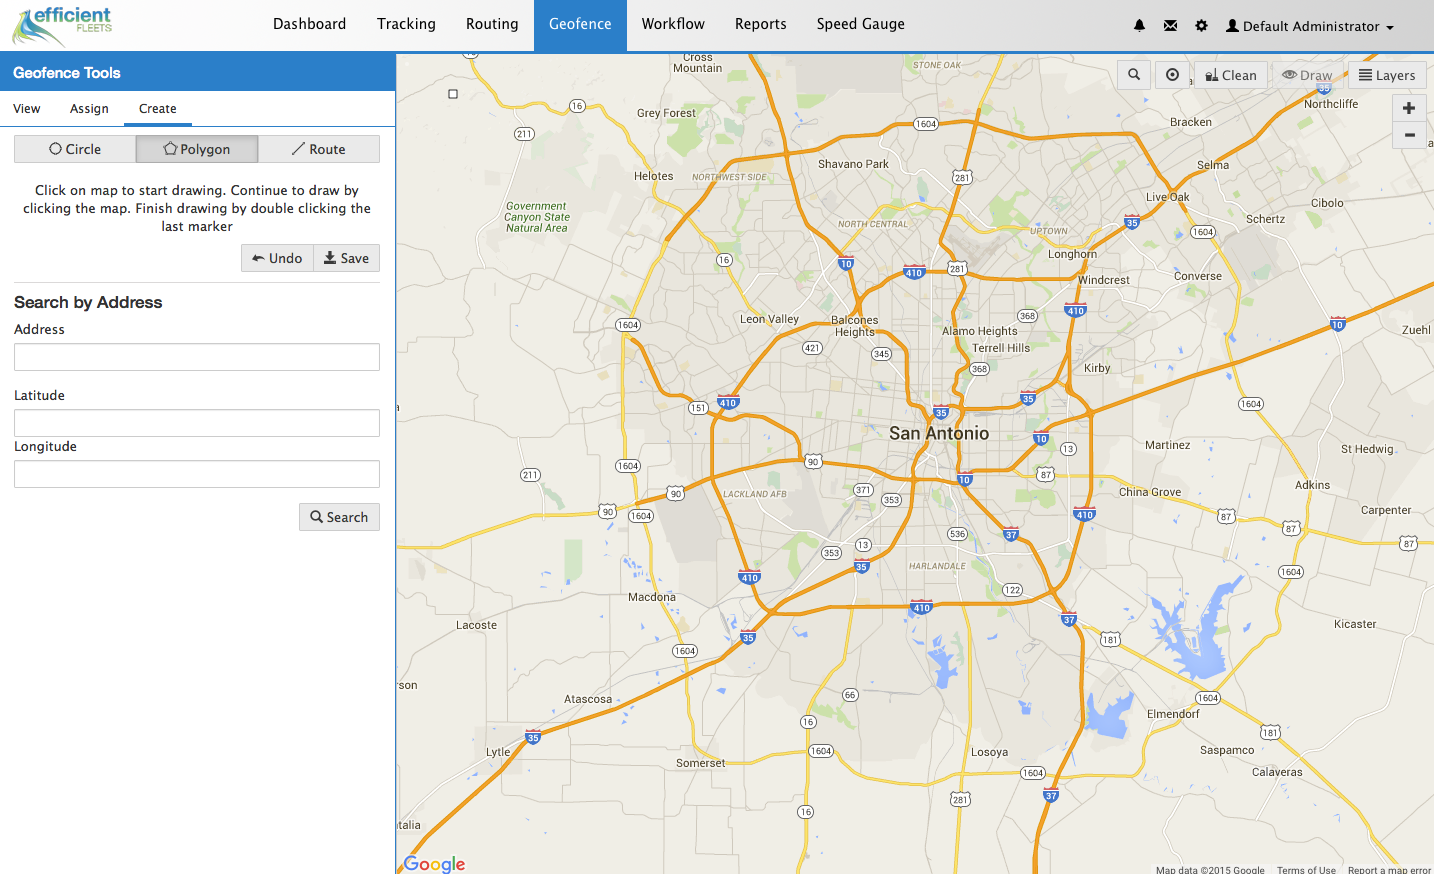
3. Click on Polygon.

select polygon


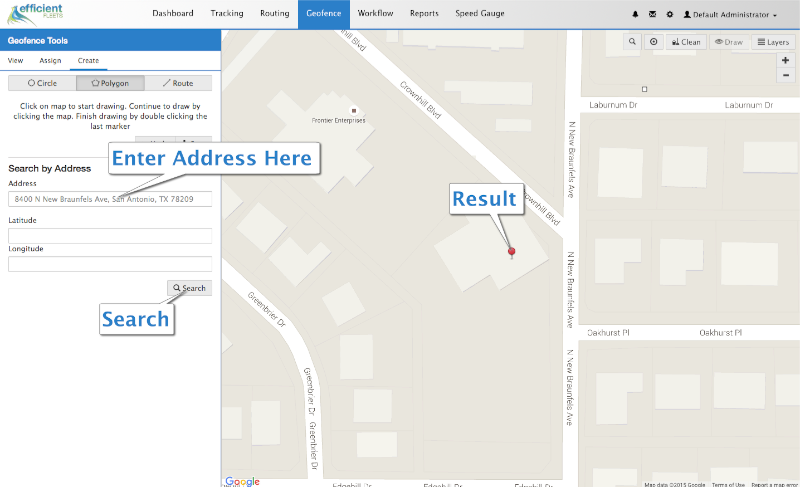
4. Enter an address into the Address box and then click on the Search button. Include the city and state for a more accurate result.

search address


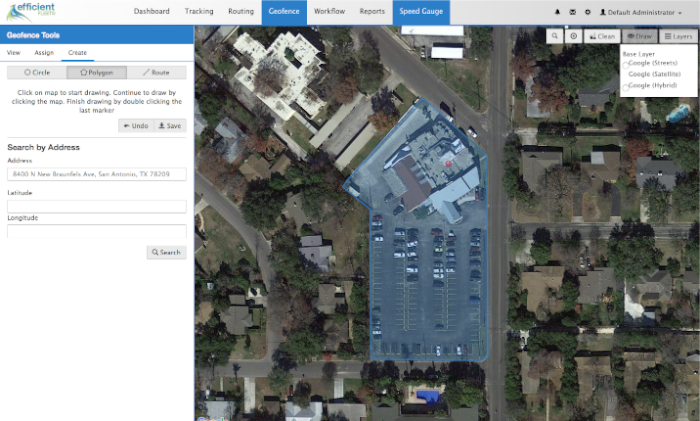
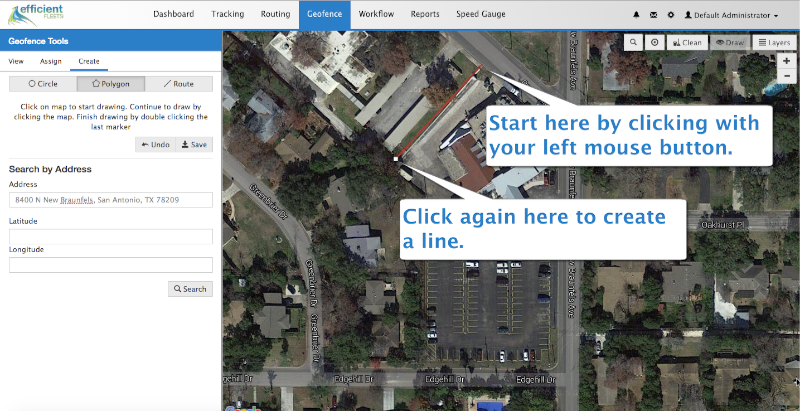
5. Start drawing the geofence around the result icon by clicking on the map with the left mouse button.
geofence line 1


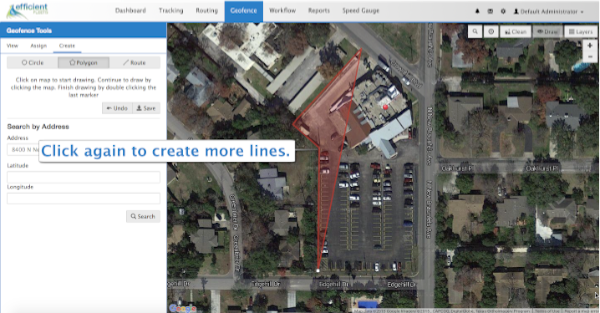
6. Click again to add another line to the polygon.
geofence line 2
7. When you are finished drawing double click the left mouse button to finish the polygon. Make sure the geofence is large enough to cover the appropriate area.

geofence finished


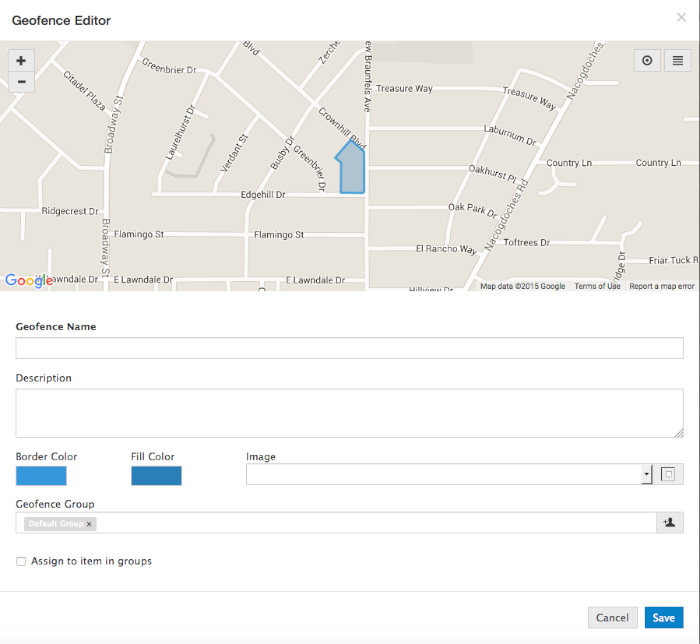
8. Click Save.

geofence editor


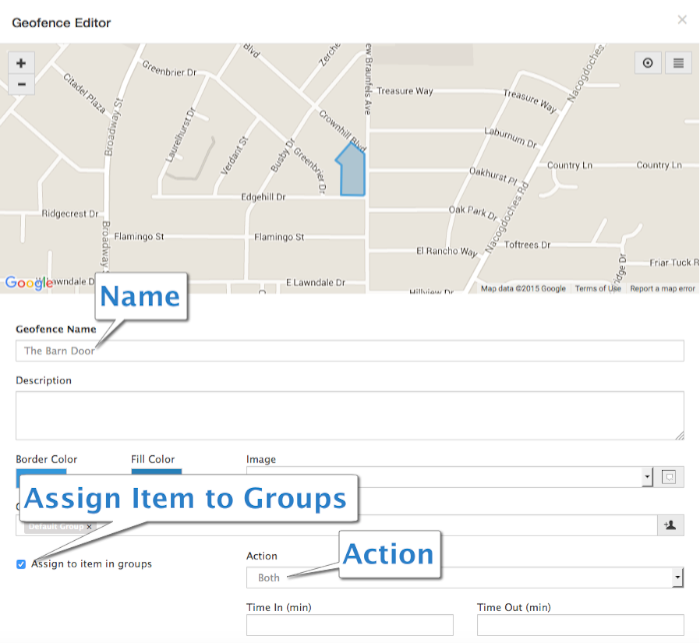
9. Enter a name. Then select Assign To Items In Groups and choose Both from the Action dropdown menu.

geofence editor 2


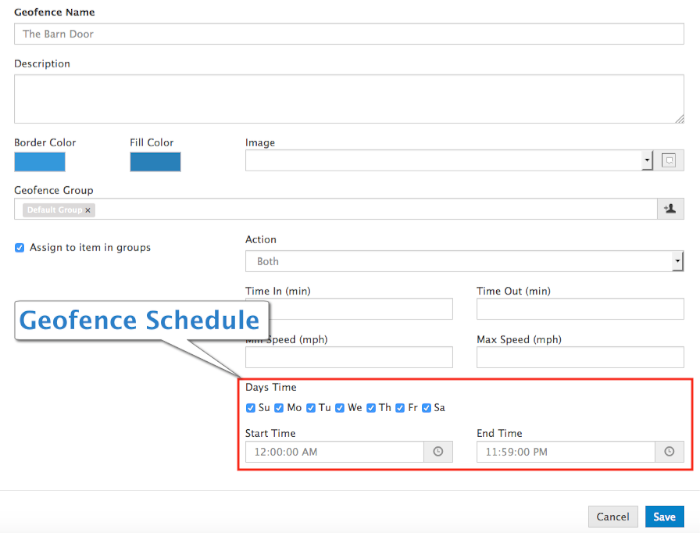
10. Scroll down the Geofence Editor. If necessary change the days and hours that the geofence is active.

geofence schedule


11. Click Save. The geofence is now ready to start recording when a vehicle enters or exits the boundary.

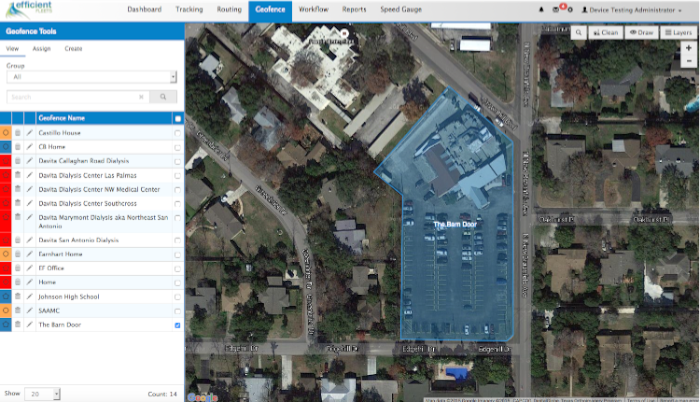
barn door geofence


Next Step: setup a geofence alert. This step is not mandatory, but if you want to receive and/or record an alert then you need to set one up. Click here to learn how.

How To Schedule An Email Report – Milo GPS

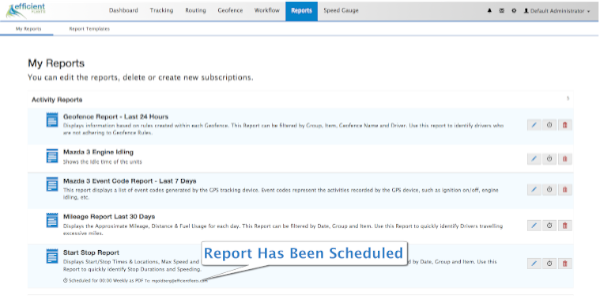
It is very easy to schedule any report to be delivered automatically by email to one or more people. A report template must be setup first before a report can be scheduled. Click here to learn how to setup a report template.

Schedule A Report

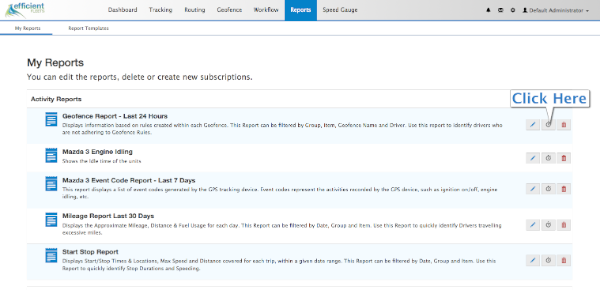
1. Click Reports.

schedule report


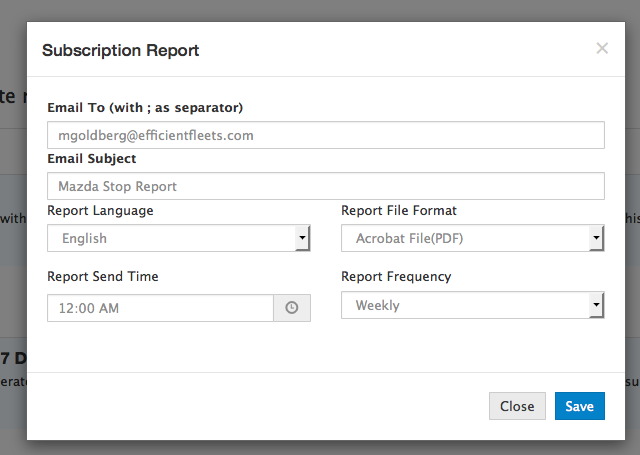
subscription report2. Click the clock icon next to the report name to open the Subscription Report window.
subscription report


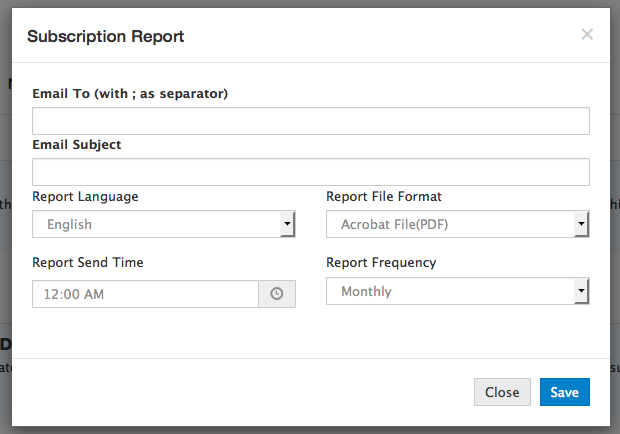
3. Fill out the form with the email addresses and email subject. Use a “;” to separate email addresses. Choose the Report File Format and the Resubscription reportport Frequency.
4. Click Save.

Scheduled Report


Related Posts

How To Run A Report – Milo GPS

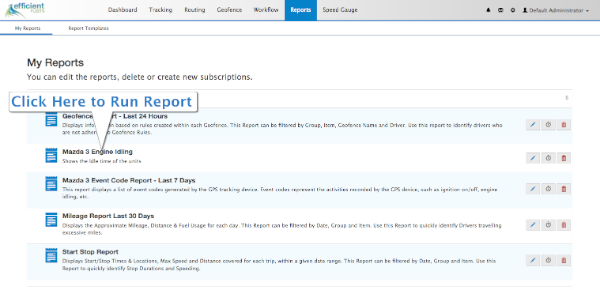
Opening or running a report is easy to do in the Milo GPS tracking system. Before you run a report you need to setup a report template. Click here to learn how to setup a template.

Note: you will need to disable your web browser’s pop up blocker to open a report.

Run A Report

1. Click Reports. You should see a list of reports that were previously setup.

reports


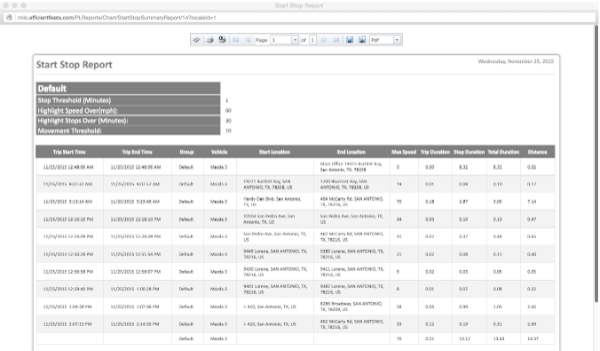
2. Click on the report that you want to run. It should open in a separate window.

stop report


Related Posts

How To Setup A Report – Milo GPS

You need to setup a report template in Milo GPS before you can view the information.
Setup a Report

1. Click Reports.

Click Reports


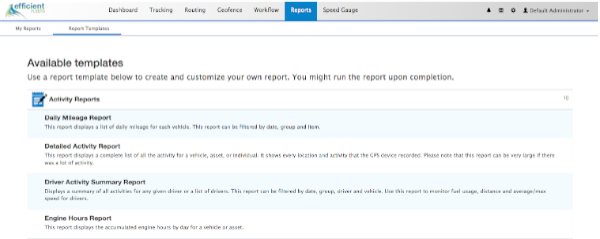
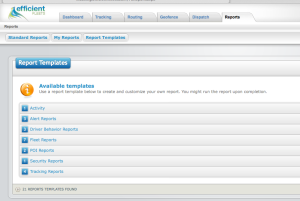
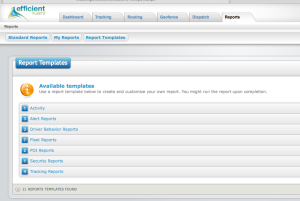
2. Click Report Templates. Choose the report that you want to setup by clicking on the name. Scroll down to see all the reports.

click report templates


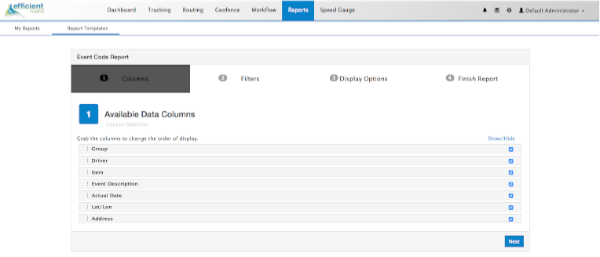
3. Select the columns that you want to see in the report. All of the columns are selected by default. Click Next.

choose data columns


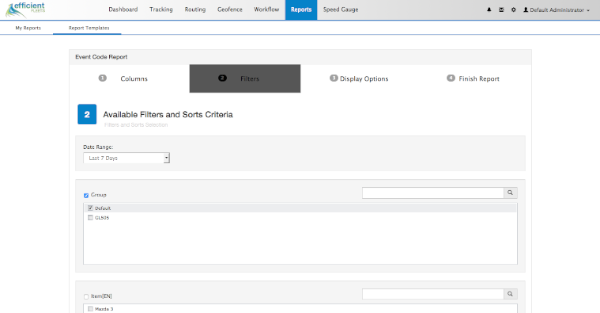
4. Choose the search criteria. The criteria could be different from the image below depending on the report you choose. Scroll down to see all the criteria. Click Next.

choose criteria


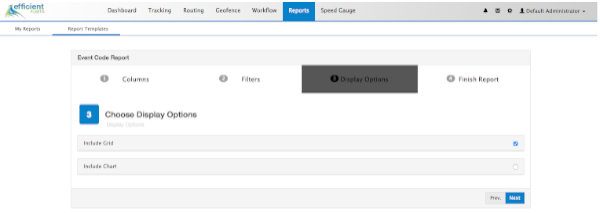
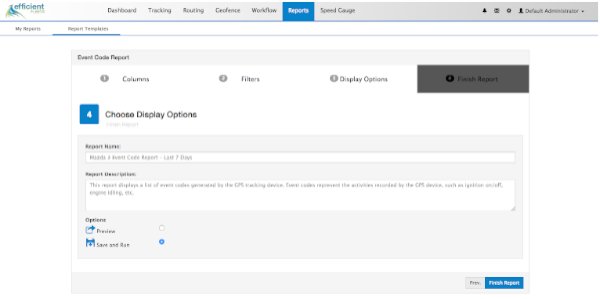
5. Choose the display options. Click Next.

choose display options


6. Type a name for the report.

name report


7. Click Finish Report.

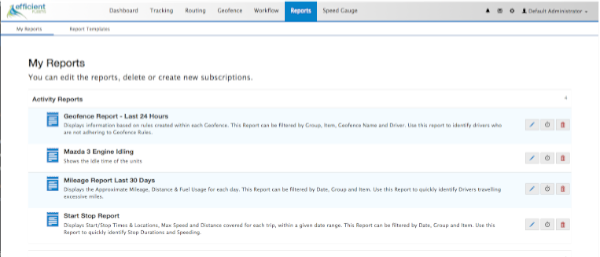
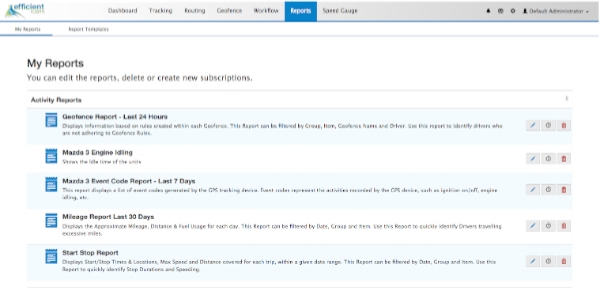
The report should now open in a separate window. You can now run this any time report from the My Reports window.

my reports


Related Posts

How To Move A Vehicle To A New Group – Milo GPS

To move a vehicle, item, or asset to a different group is easy to do in the Milo GPS system.

Please follow the steps below to learn how to move a vehicle to a new group.

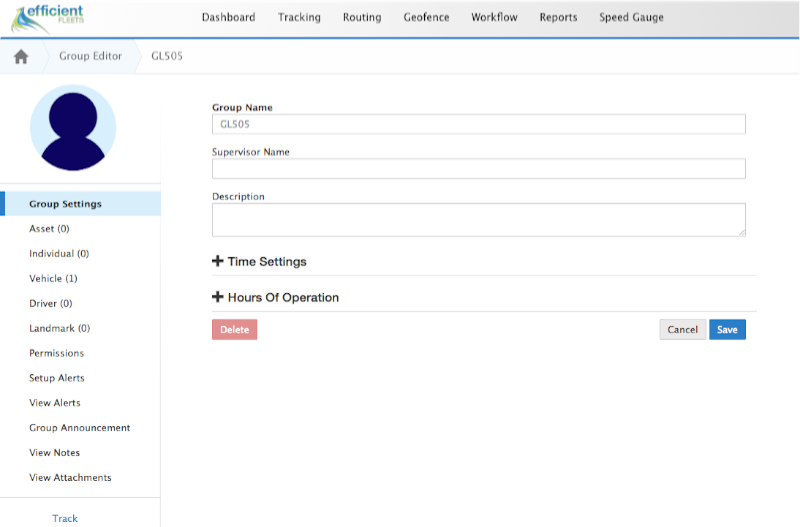
1. From the Dashboard…click on the name of the group that you want to move the vehicle to.

Move Vehicle
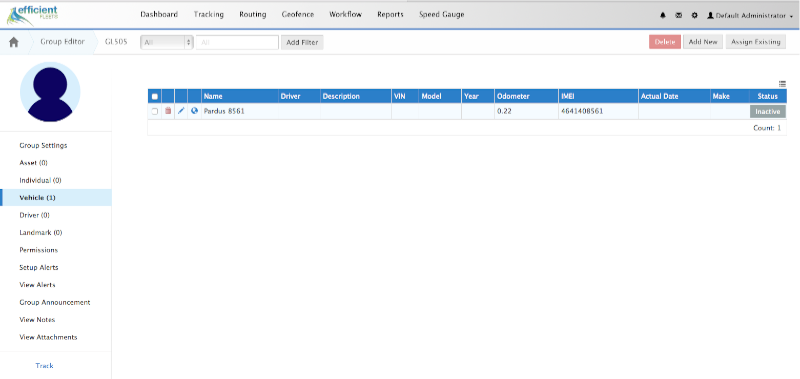
2. Click on the Vehicle link on the left hand side.

Move Vehicle

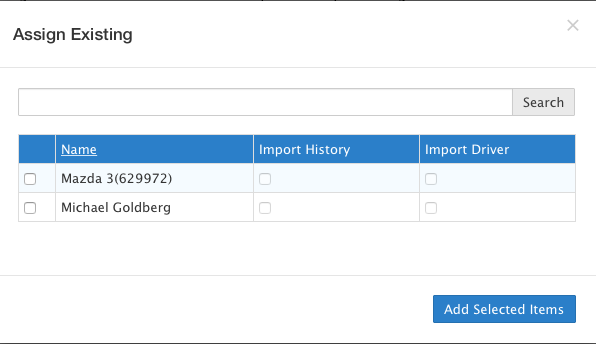
3. Click on the Assign Existing button in the upper right corner. You should now see the Assign Existing window.

Move Vehicle


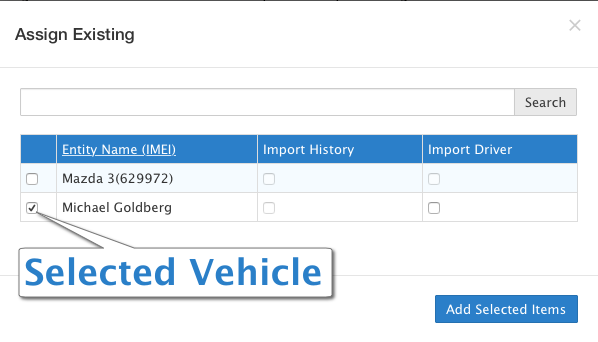
4. Select the vehicle(s) that you want to move to the new group by clicking on the checkbox next to the vehicle name.

Move Vehicle


5. Click on the Add Selected Items button. You should now see the vehicle(s) in the new group.

MovedVehicle

Garmin Dispatch – Milo GPS Tracking

Garmin Dispatch

What is the Garmin Dispatch?

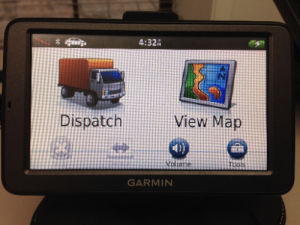
The Garmin dispatch is an optional add on to the Milo GPS tracking system. The Dispatch system allows a dispatcher (or anyone else) to send and receive messages to any vehicle that has a Garmin navigator attached to their GPS tracking device. You can also send stops and routes to the driver.
Note: not all Garmin navigators are supported. Click here to see a list of Garmin navigators that are supported by the Milo GPS tracking system.

Garmin Dispatch Tips

The list below is a helpful set of tips and tricks that we have compiled on how to operate and troubleshoot the Garmin Dispatch.

1. Make sure the vehicle is on when sending a message or a route to the vehicle from the tracking website. The vehicle does not have to be running. The key can be in the “on” position.

2. Disconnect Icon on Garmin Screen. If the driver sees the disconnect icon in the top left corner of the Garmin screen then the GPS tracker and the Garmin are not communicating. Turn the vehicle’s ignition off for at least 10 seconds. Then turn the ignition on. This will reset the GPS unit and should reestablish connection between the Garmin and the GPS tracker.

Garmin Disconnect Icon

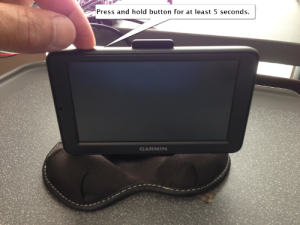
3. Blank Garmin Screen. Sometimes the Garmin does not turn on automatically. Press and hold the button on the top left corner of the Garmin to turn it on.

Turn On Garmin

Efficient Fleets

We are a GPS tracking company that makes your vehicles safer, more efficient, and less expensive. To learn more about how GPS tracking can prevent side jobs and improve customer service please contact us for a free demo.

How to Add New Maintenance Operation – Milo FMS

This How To document describes how to add a new maintenance operation in the Milo Fleet Management System. A maintenance operation is a maintenance task, such as, oil change, brake job, air filter change, etc. You can add as many maintenance operations as you want. A maintenance reminder can be setup for any maintenance operation.

Please follow the steps below to add a new maintenance operation.

Note: Click on screen shots to enlarge.

1. From the Dashboard…Click Tools/Settings tab.

Dashboard

2. In Client Tools, click Create and Manage Maintenance Item.

Client Tools

This opens the Manage Maintenance Operation window.

3. In Manage Maintenance Operation, click Add New Maintenance Operation.

The Maintenance Item Editor box will open.

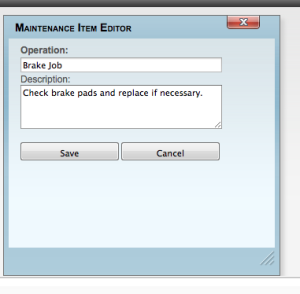
Maintenance Item Editor

4. Complete the form.

Maintenance Item Editor done

Click Save.

The item is now added to the list.

Item added

How to Setup a Report Subscription – Milo Fleet Management System

How to Setup a Report Subscription

Setup a report subscription to automatically receive a report by email. You can choose a daily, weekly, or monthly schedule. The report can be sent as a PDF, Excel, and other popular formats.

Follow the steps below to setup a report subscription.

Note: Click on screen shots to enlarge.

1. From the Dashboard…click Reports tab.

Reports Tab

2. Click My Reports

My Reports

3. Click on the category for the report you want to subscribe to.

Category selection

4. Click the Clock icon next to the report you want to subscribe to. The Report Subscription setup form should appear.

Geofencer with clock

5. Complete the form.

Enter email address into the Email To text box.

Enter an email subject into the Email Subject text box.

Select a language from the Report Language dropdown menu (Default is English).

Select a format from the Report File Format dropdown menu (Default is PDF).

Select a send time from the Report Send Time calendar (Default is midnight).

Select the report frequency from the Report Frequency dropdown menu (Default is Monthly).

Completed Form

6. Click Save. You will now go back to the My Reports screen.

My Reports

How to Confirm Subscription Settings

1. Click on My Reports

My Reports

2. Click on the report category. You should see the subscription settings underneath the report name.

Confirm sub

How to Setup a Mileage by State Report Template – Milo Fleet Management System

The Mileage By State report displays the miles driven in each state by vehicle. Follow the steps below setup a Mileage by State report template.

1. Open a browser and login to your Milo account.

Milo login

2. From the Dashboard…Click Reports tab.

Dashboard

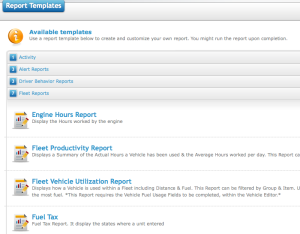
3. Click Fleet Reports (fourth report down).

Fleets Report

4. Click Mileage By State

Note: Mileage By State is second to the bottom.

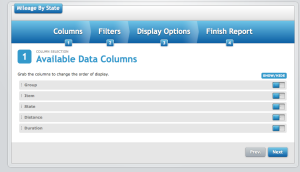
Choose Data columns that you would like in the report.
Click SHOW/HIDE button to show or remove column from the report.

Note: By default, all columns are visible in report.

Mileage by State

Click Next.

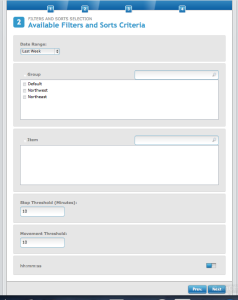
5. Choose the Date Range and the vehicles that you want in the report.

Set the “Date Range” by clicking the drop box, then choose “Group,” leave all other options the same.

Date Range

Click Next.

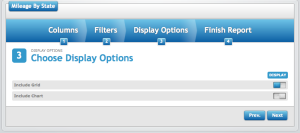
6. Choose Display Options.

DISPLAY: Include Grid is selected by default. To Include Chart, slide the button to the left.

Display Options

Click Next.

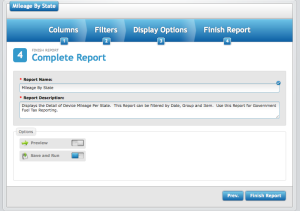
7. Complete Report

REPORT NAME Change name of report by typing a new name in the box.

Complete Report

All options remain the same.

Click Finish Report.

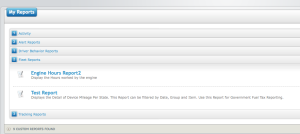
8, Once the template is created, return to My Reports and click Fleet Reports.

My Reports

Click the name of the report to view.

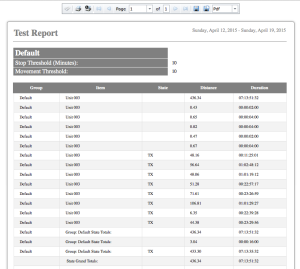
9. This is what the report template will look like. (“Test Report” is the name given for this instructional.)

Test Report

Next step will be How to Setup a Report Subscription.

How To Prevent Side Jobs & Personal Errands

How Do Side Jobs and Personal Errands Affect Your Bottom Line?

Van Driver

Side jobs and personal errands are a huge problem for service companies, such as plumbers, landscapers, electricians, and other similar businesses. The impact that this type of activity can have on your bottom line is huge. Your technician is using the company’s resources (fuel, equipment, time) for his or her personal gain.

The driver has a degree of freedom that your office staff does not have. They are allowed to drive an expensive asset loaded with thousands of dollars in tools and equipment. There is very little control that an owner or manager has without a monitoring system.

A GPS tracking system gives the control that you need to effectively manage your field staff. It monitors the vehicle’s movement 24 hours per day. You can easily review a vehicle’s history to see if a driver was off task.

GPS tracking can give you peace of mind and more profits.

5 Ways GPS Tracking Can Help Prevent Side Jobs and Personal Errands

1. Inform Drivers That They Are Being Monitored

Observed Behavior Changes

2. Put a Landmark Around the Driver’s Home

Receive Alert If Driver Goes Home

3. Create a Landmark Around Customer Locations

Accurately Record Arrival and Departure Times

4. Review Trip Report Periodically

Look For Inconsistencies

5. Compare Daily Mileage Report

Check For Spikes In Mileage

Efficient Fleets is a logistics company that uses GPS tracking and mapping to make your fleet safer, more efficient, and less expensive. To learn more about how GPS tracking can prevent side jobs and improve customer service please contact us for a free demo.