


A geofence has to be assigned to an item before it can be used.
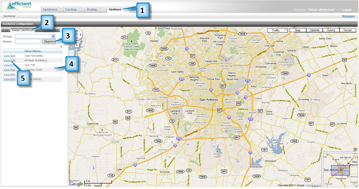
1. Click on the Geofence tab.
2. Click on Assign Geofence.
3. Click on the Search button.
4. You should now see a list of vehicles.
5. Click View/Edit next to the vehicle that you want to assign a geofence to.
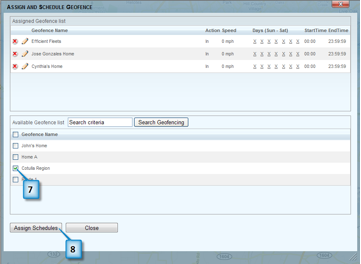
6. You should now see the Assign and Schedule Geofence dialog box.
7. Click on the checkbox next to the geofence(s) that you want to assign to this vehicle.
8. Click on the Assign Schedules button.
9. Select the Action. See below for a definition of the options.
10. Set the schedule for the geofence. By default a geofence is active Sunday through Saturday, 24 hours a day.
11. Click on the Save Assignments button.
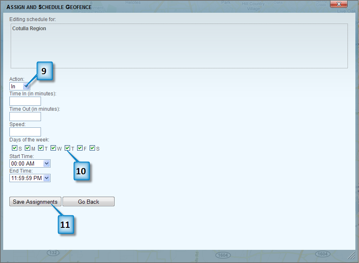
Action
• In = generate a violation if the vehicle enters the geofence. If a geofence alert is setup then an alert will be created when the item enters the geofence.
• Out = generate a violation when the vehicle exits the geofence. If a geofence alert is setup then an alert will be created when the item leaves the geofence.
• Both = generate an alert when an item enters or exits the geofence.